How to make Instagram Panorama (swipegrams) Carousels
Hi friends! A lot of you were asking for a tutorial on how to make these panoramic #swipegrams on Instagram - so here it is. It is pretty simple, and can be done through a variety of programs and apps, but this is how I do it. My workflow (and this tutorial) will show you how to do it with Adobe Lightroom & Photoshop on a desktop computer.
Panoramamic Carousel Instagrams (aka #SWIPEGRAM)
A Swipegram is basically multiple images in a carousel post that all connect together so it looks like one single image - see the gif example above.
For those who follow my blog & Instagram, you’ll know how much I try to avoid posting in crops smaller than the vertical (4:5) size on Instagram (read why here). Swipegrams offer a kind of trade off & compromise to this problem. They offer an interactive way to display landscape crop photos to take up the maximum amount of screen real estate on Instagram.
This tutorial will teach you how to compose, crop, cut and post a swipegram to your Instagram.
What you’ll need:
You’ll need a relatively decent resolution image that works in a landscape (horizontal) format. You’re going to be cutting up your image into multiple pieces, so each piece in the end should be at least 1080x1350 (4:5) pixels.
My free swipegram Photoshop template:

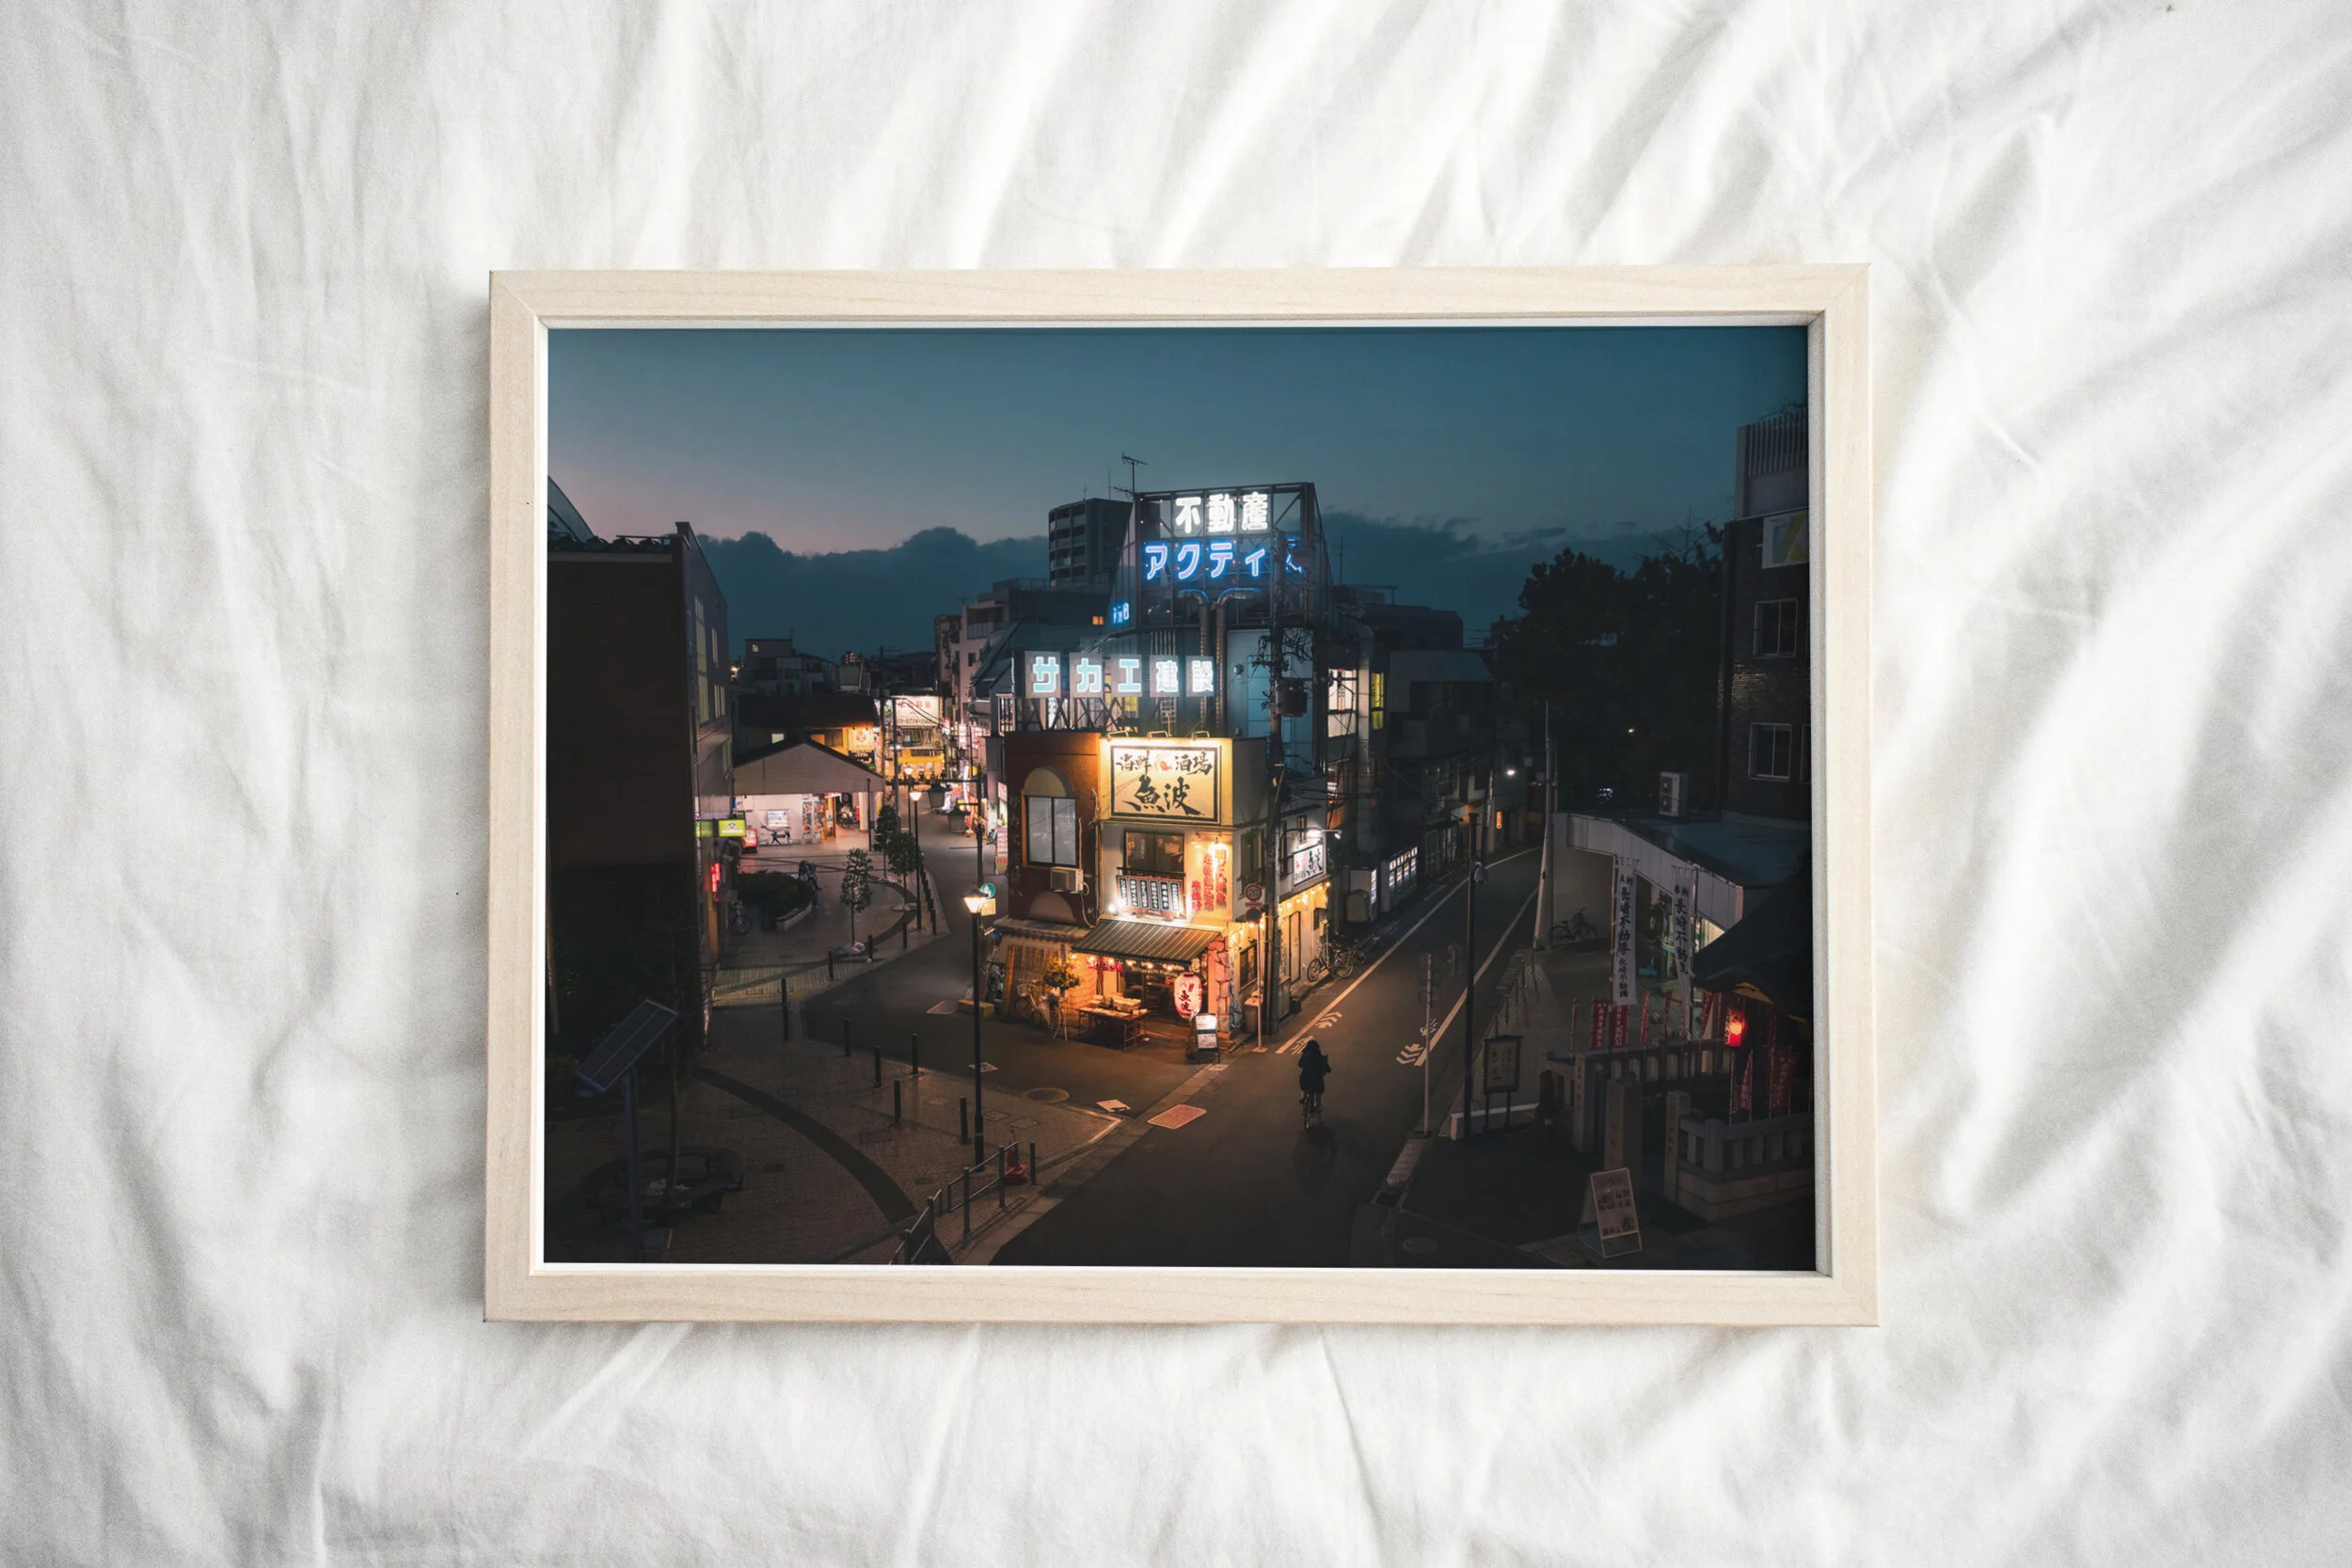
01. Find & edit a suitable image
Find a suitable image for your swipegram. Ideally the image should be a stronger, more interesting photo a landscape crop - or else you should probably consider just posting it as a single 4:5 sized image.
Once you’ve found the right photo, go ahead and edit it so that it’s ready to post.
tap image to enlarge
02. compose & crop it
This is where you’re going to crop your photo into a panoramic sized photo.
- In Adobe Lightroom enter the crop function.
- In the right panel click Aspect and then Enter Custom - a box will pop up.
- Enter the aspect ratio of 8 x 5.
- Compose your image to how you want it to look.
- Once you’re done, export the image (max size, 300dpi).

03. cut it up (photoshop)
Now you’re going to use Adobe Photoshop to cut the image into its pieces. To make this super simple for you, I’ve created a free Photoshop template with all the guidelines and sizing setup.
All you need to do is to:
- drop your image in the template.
- resize your image to fit (Apple / Control + T).
- turn off the Instructions folder layer (right panel, click the eye)
- crop & export each side.
Download my free template here (PSD)

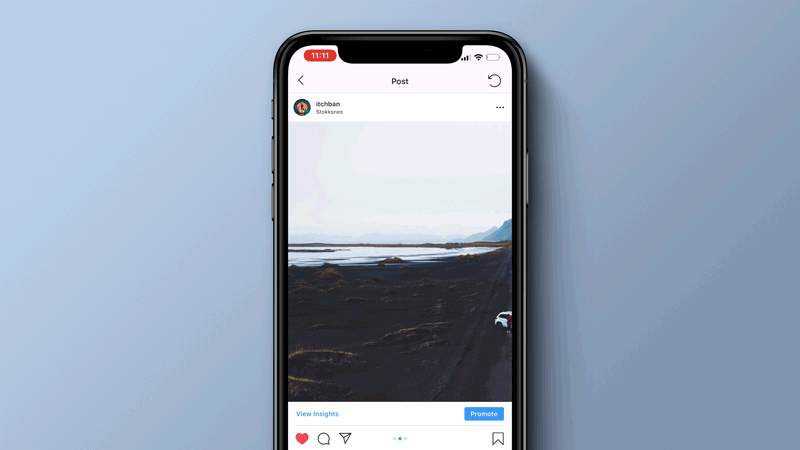
04. post it to instagram (carousel)
All that’s left is to post the images as a carousel set on Instagram. The obvious tip here is to make sure that you post it in the correct order.
Pro tip: In order to save the look and flow of my feed, I prefer to post a single 4:5 version of the photo as the lead image, followed by the two swipegrams. You can see some examples of what I mean here, here & here.
Some final thoughts about swipegrams
I think Swipegrams are a cool way to post landscape cropped photos to Instagram, whilst taking advantage of the maximum screen real estate. At the same time, I think it’s important to think about why you’re actually posting each Swipegram.
Does posting a swipegram add any value over posting just a single 4:5 image?
Consider posting a leading, standalone (4:5) image. It will help in engagement and make your feed look more consistent. Not everyone will want to swipe through the images, so at least they can also have a full image to look at.
Both images of the swipegram should be interesting - especially the first one. You need to give people incentive to swipe through the whole thing.
Swipegrams are not limited to just 1 landscape image. Technically you can post 10 individual images - so get creative and have fun with it.
Hope this tutorial and tips help! Let me know what you think and if you have any questions in the comments below.
It’d be cool if you gave me some feedback on this tutorial and let me know what you want to write about next.
Follow me on Instagram @itchban